
 Home >
 Products
 25.00
Price:$20.00
25.00
Price:$20.00


 Key Features
 How to Use Mac Video Enhancer
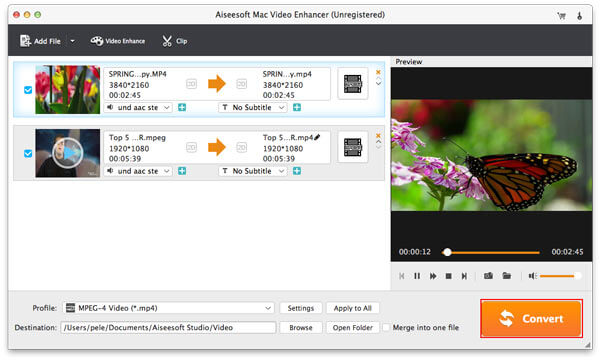
Mac video enhancer is the best video enhancer. It enhances your video quality and rotates sideways video to correct angle on Mac. It also allows you to edit video with offered cropping, clipping and watermarking functions. In the following tutorial, you will get to know how to use Aiseesoft Mac Video Enhancer to enhance video quality.
1. Add video files on Mac
Install this video enhancement software and run it on Mac. Click Add Files to load videos. Here you are allowed to import video files in bulk.

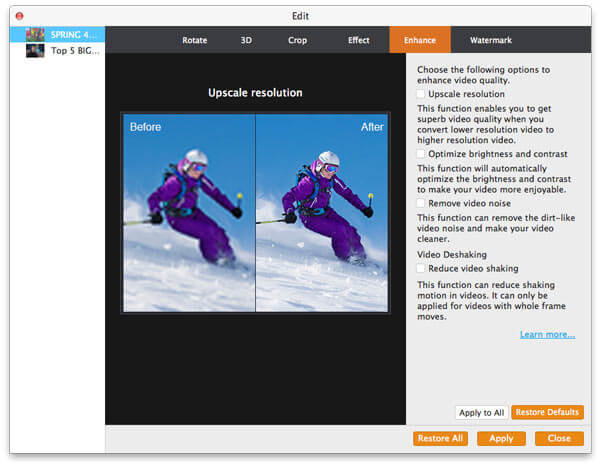
2. Enhance
Click Enhance video button in the main interface to start to enhance video quality. Here it offers three ways to improve video quality, upscale resolution, optimize brightness and contrast automatically, and remove video noise. You can select the wanted function to help enhance your video. For getting a perfect effect, we suggest you to tick three options.
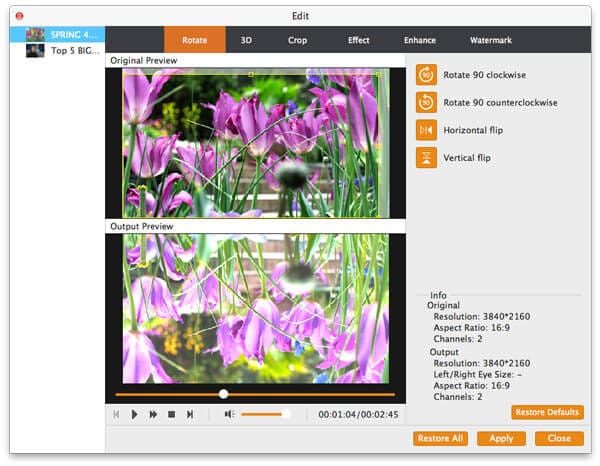
3. Rotate and flip
On the interface of Enhance, you will find the button of Rotate. Only one click to rotate your recorded sideways video to correct angle with 90 clockwise or 90 counterclockwise. Also this function enables you to flip video vertically and horizontally.
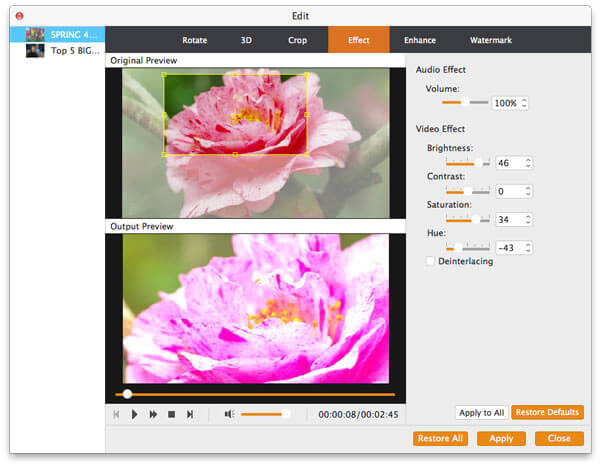
4. Edit
In the effect interface, pull the roller to adjust video brightness, contrast, saturation and hue. Also you can regulate volume to control your video audio.
5. Crop
For deleting the letter box of movie to suit your screen perfectly, or getting a close-up for your favorite images, just click Crop to set the crop according to your needs.

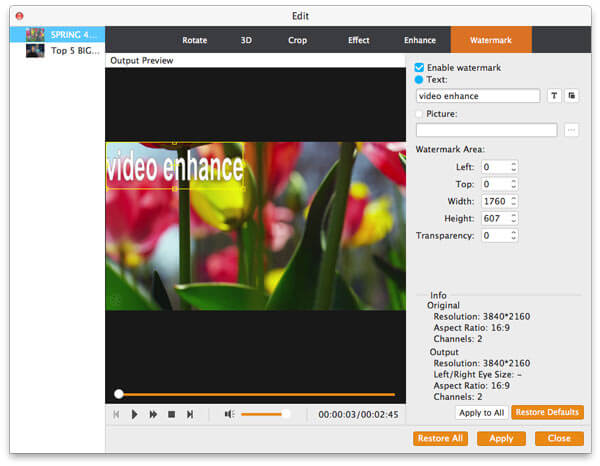
6. Watermark
Click Watermark – Enable watermark to add either text or picture to specify your personal watermark. For text, it gives font, effects, writing system and color to define. As for picture, it's no limit to any image. The watermark area and transparency are available to make adjustment.
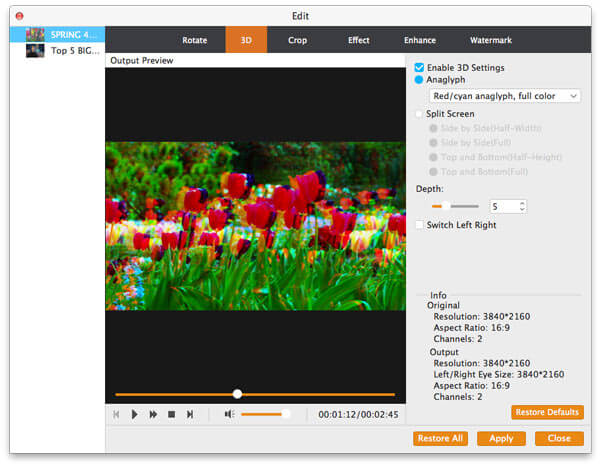
7. 3D modes
One of editing feature is 3D effect. Hit Enable 3D settings – Anaglyph/SpiltScreen to choose 3D modes. Also regulate depth to fit your need. Click Apply on the right bottom to achieve the results.
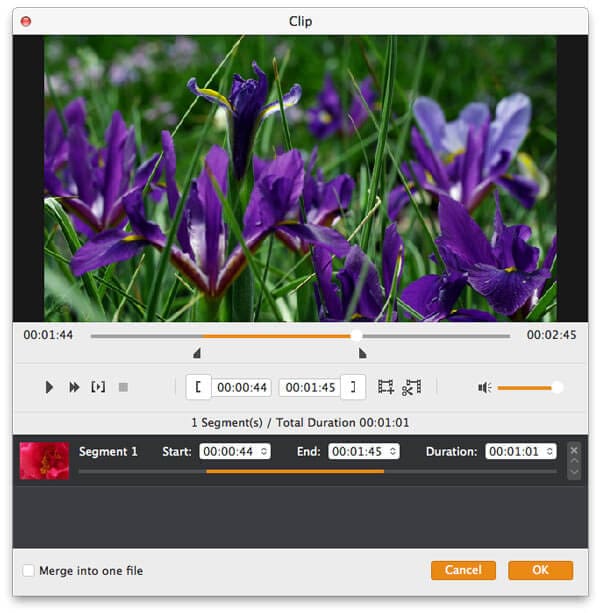
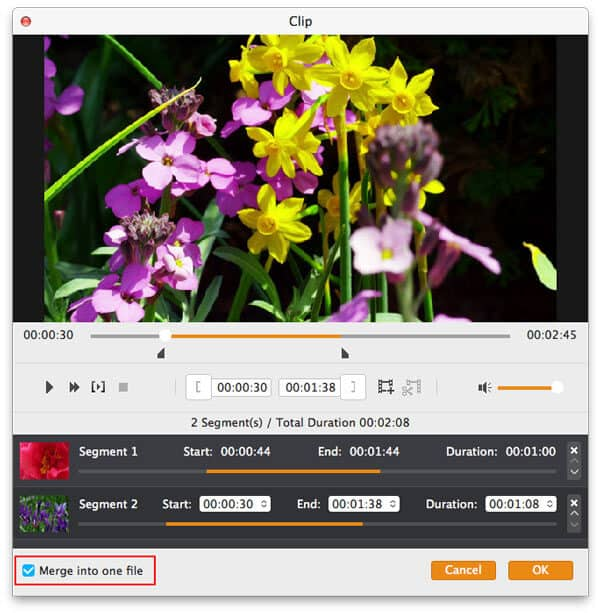
8. Clip and merge
In the main interface, another distinguished function is clipping and merging. Click Clip to enter into the process of clipping video. After confirming the clipping parts, click the cut button (the image with one pair of scissors). You have two ways to set your clipping starting point and ending point;
Method one: pull the two arrows to the place where you want to start and end.
Method two: roll the ball to place where you want to start, and click the left time bracket to locate the starting point. Work the same way to locate the ending point.
For merging function, we also have two ways to realize it.
Method one: In the interface of Clip, it offers a radio box to merge the clipped videos above.
Method two: In the main interface, you will find the radio box on the bottom, where you are able to merge clipped videos or other videos into one file.
9. Convert
After finishing all the enhancing or editing effects, click Convert in the main interface to complete the last step. Before this step, you are able to set your output video formats. It's easy to choose one kind of format from the drop-down menu of Profile.
 Related Articles


 Retail Price: $
 Buy Now
 Download


 Copyright © 2012 Z0DOWNLOAD.COM. All rights reserved.