[Summary] Have you ever suffered a catastrophic data loss accident in Samsung? Have you deleted the data of Samsung Galaxy note series by mistake? Do you know how to retrieve deleted data from Samsung Galaxy note series with a simple method? We will introduce a professional Samsung Galaxy note data recovery program to help you Recover Data from Samsung Galaxy Note Series.
No matter what kind of Samsung Galaxy note phone we use, we always have some problems. For example, you accidentally delete important data from Samsung phone. Generally speaking, there are several situations that may lead to the loss of our data, such as accidental deletion, factory reset, phone crash. What should we do if we encounter these problems in Samsung Galaxy note? Now we will provide the most effective way to recover the data you deleted from Samsung Galaxy note.
The most effective way to Recover data from the Samsung Galaxy Note Series
Android data recovery is a famous Android data recovery program. In case of any data loss, the deleted data can be recovered from Samsung Galaxy note series. Thanks to this program, you can easily restore deleted files from Samsung Galaxy note with a few clicks. It can selectively recover names, phone numbers, email addresses and more personal information. In addition to contacts, it also supports other types of Android files, such as SMS, photos, videos, call logs, WhatsApp data, documents, etc. On the plus side, this program allows you to preview selected data before restoring. Android data recovery is applicable to almost all models of Samsung mobile phones, such as Galaxy note 20 / 10 / 9 / 8 / 5 / 4 / 3, Galaxy S20 / S11 / S10 / S9 / S8 / S7 / S6.
Tutorial on How to recover data from Samsung Note
1 Download & Install FoneLab
Go to FoneLab Official Website, select the windows or Mac versions through clicking Download for PC or Download for Mac.
2 Run FoneLab on Computer
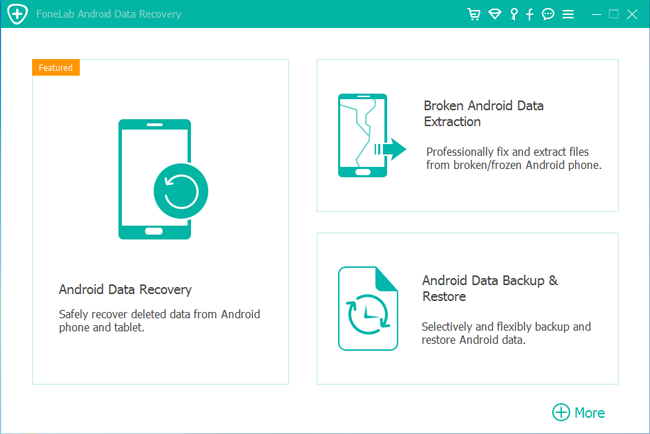
Launch FoneLab Android Data Recovery on your computer, choose Android Data Recovery and then connect your device to the computer with USB cable.
There are other two options including Broken Android Data Extraction and Android Data Backup & Restore to fix Android OS problems or backup & restore Android data.
3 Enable USB debugging
You can follow the on-screen or below instruction to enable USB debugging.
Android 2.0-2.3.x: Settings > Applications > Development > USB Debugging
Android 3.0-4.1.x: Settings > Developer Options > USB Debugging
Android 4.2.x-Android 5.0 Lollipop: Go to Settings > About phone or About tablet, tap Build Number a few times till you see You are now a developer!, and then back to Developer Options under Settings app, to tick the box next to USB debugging.
4 Choose Scanning File Type
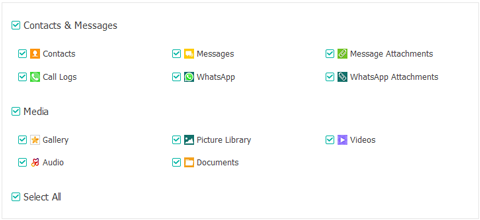
Tick the boxes of the file types you want to recover, click the green Next button in the bottom right corner. If you want to recover all Android data on the device, you can check the box next to Select All.
5 Get Privilege
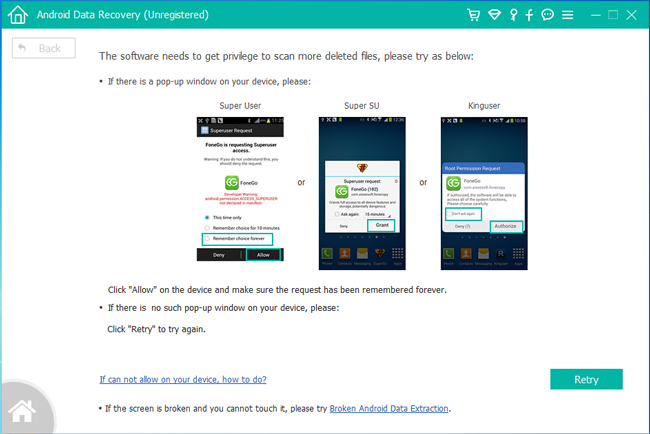
The program will need the privilege to read your device data so you should follow the on-screen instruction root your device.
The program will ask you to install the root app to your device and then tap Allow/Authorize/Grant on the pop-up window on your device once the app is installed successfully. Then it will begin to root and scan your data.
6 Select Recoverable Files
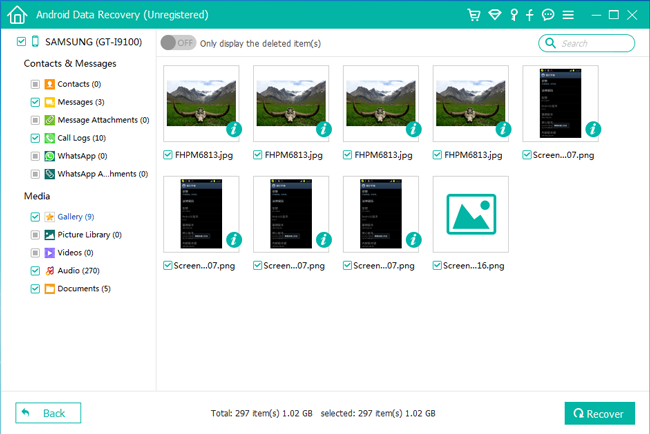
So, you can see all recoverable data after the scanning is done. Click the file type from the left column, and then tick the items you want to get back. Click Recover.
If you want to find the items you want effectively, you can turn on the button on the top of the window to display the deleted items only.
7 Choose Folder & Recover
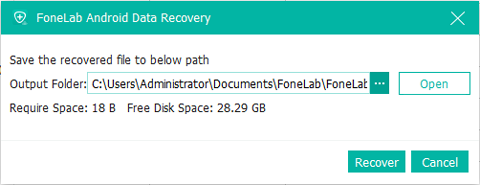
You can get a pop-up window to show you the path that to save the recovered data and you can change the path as you like, click Recover again.
Now, download Android Data Recovery program to have a try!
 Home >
.png)
