 Home >
Always feel the phone memory is not enough! Is not it? ? Unless you have the time and expertise to delete some unnecessary files and Apps. When you hands to organize the phone storage space, you may found the video file may taking up the most storage space, so you'll feel just delete this video will instantly solve the problem of lack of storage space. In fact, APP, photos, music and more will take up a lot of unnecessary space. Today, let us teach you two ways to release the iPhone storage space.
| Way 1: Free Up iPhone Storage by Deleting iPhone Contents through Usage Setting Way 2: Free Up iPhone Storage by Compress iPhone Photos or Export Photos to PC |
First thing: Find out what’s taking up the most space on your phone. You may have some unexpected storage hogs.
Fortunately, iOS 14,iOS 13,iOS 12 can easily see what types of files take up storage space, simply delete the largest files can easily free up more storage space.
First, open the Settings -> General -> Usage. The list shows which items have occupied storage space, and what is the biggest space project Yes.

Remove the movies and TV shows:
Click on the video, you can see a list on the left image shown in the following figure.

Top right, click the Edit button, the red delete button will appear, as shown on the right side of the picture shown, now you can begin to free up some space.
Delete pictures with the camera:
This list shows the camera roll, photo gallery and photo streams are taking up much space, but it can not be deleted individually. Delete photos fastest way is to connect to iTunes, import photos, and then delete it.

If the photo may be part of a backup, delete the backup.

Your device backs up its data to the cloud when it’s connected to both WiFi and a power cable. Unless you specify otherwise, that includes your entire Camera Roll. It’s like a mini-time capsule. In short, a photo you took a month ago and just got around to deleting may still be in the cloud if your phone backed up in between. (Celebrities’ backups saved to iCloud servers likely gave hackers access to the personal photos leaked in September.)
So, to delete a backup, go to Settings > iCloud > Storage & Backup > Manage Storage, then select your device and the backups you’d like to remove. (These steps look slightly different from the image above on iOS 8.) You also can prevent photos from being included in future backups by toggling Camera Roll off.
Remove unused APP:
In the amount of the list, a long list of applications, view details for these applications, you will find a button to remove the application. Delete those APP rarely use or do not want to reuse it.

Delete other items:
In fact, not all options are present in the amount of the list.

Many people like taking photos and videos by iPhone,and iPhone photos will takes up lots of space on our ios devices. To get more storage space,we can permanently deleted photos on iPhone; export iPhone photos to PC or compress photos on iPhone without distortion.
iPhone Data Eraser not only can help you to permanently erase all files on iPhone 13, 12, 11, XS, iPhone XR, X, iPhone 8, iPad Pro and more, but also help you free up iPhone storage by compressing iPhone photos or export iPhone pictures to computer directly.What’s more,the iOS Data Eraser allows users fix and optimize slow iPhone problem easily.


Once running the Dr.Fone on your computer and you'll see all features inside as following. Select "Data Eraser" among all the functions.
.jpg)
Next, let's check how to use Dr.Fone - Data Eraser (iOS) to erase all data on the iPhone in steps.
Step 1. Connect your device to the computer
Connect your iPhone or iPad to the computer using a lightning cable. Once it recognizes your device, it displays 3 options for you. Choose Erase All Data to start the data erasing process.
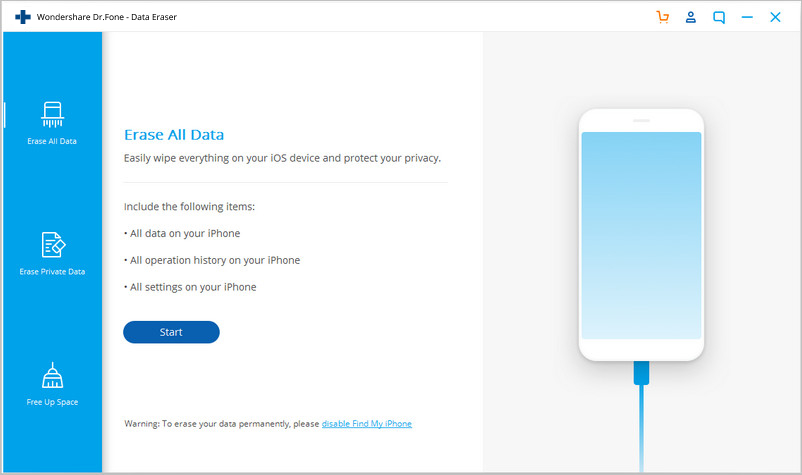
Step 2. Start erasing your iPhone completely and permanently
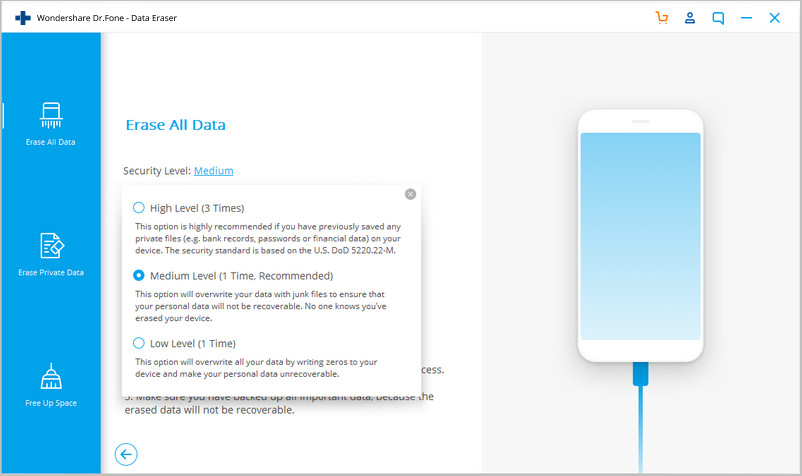
When the program detects your iPhone or iPad, you can select a security level to erase iOS data. The higher the security level, the lower possibility your data can be recovered. Meanwhile, a higher security level takes a long time to erase.
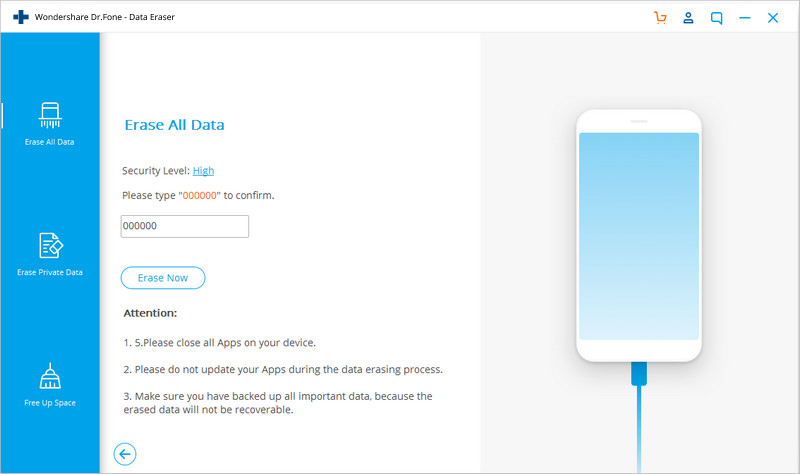
Since the erased data can't be recovered, you need to be careful and enter "000000" to confirm your operation when you are ready.
Step 3. Wait until the data erasure is complete
Once the erasure begins, you don't need to do anything, but wait for the end of the process, and keep that your device is connected during the whole process.
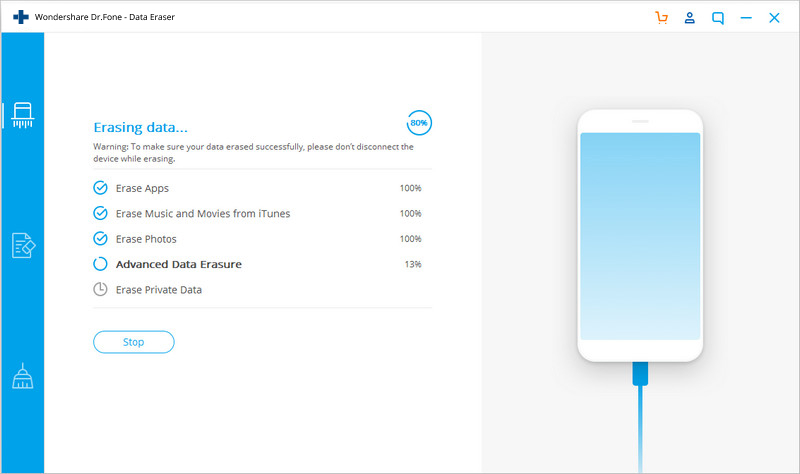
The program requires you to confirm the rebooting of your iPhone or iPad. Click "OK" to continue.
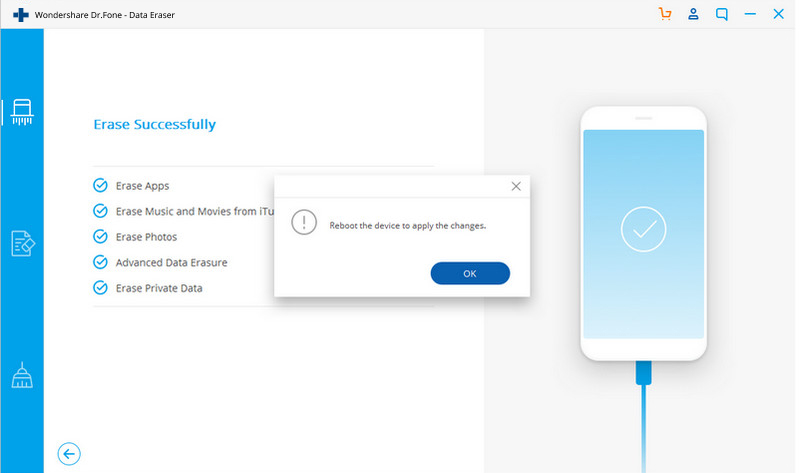
When the data erasure is complete, you will see a window appearing as follows.
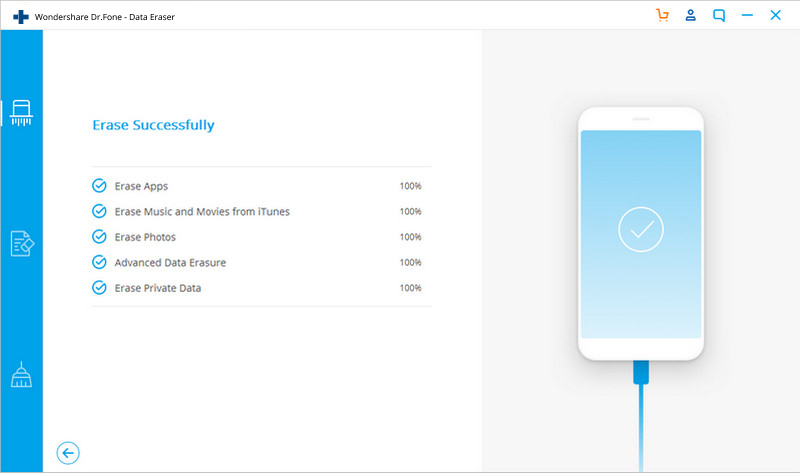
Now, your iPhone/iPad is fully erased and turns into a new device with no content, and you can begin to set it according to your need.
Free download the iOS Data Eraser and have a try!
Related Articles:
Permanently Delete Text Messages from iPhone for Sale
How to Delete iPhone Contacts before Selling
How to Delete Photos/Videos from iPhone before Selling it
How to Backup and Restore iPhone Data