 Home >
As we all know, not all apps can be remove from your iPhone, iPad and iPod devices. However, the ones that can be deleted require a few simple steps to be performed to complete the task. Today,we teach you 5 ways to Delete any App from your iPhone or iPad,please according to the actual situation, choose your method.
On the springboard, locate the app you want to delete.
Tap and hold down the icon of the application you want to delete. After a few seconds your screen will start to “wiggle” and an X will appear next to each of the apps you’ve installed via the App Store.
Tap the “x” next to the icon of the app you want to remove. When prompted, select “Delete“.
Poof !!! And now it’s gone.
If the application is listed in your iTunes Applications as well, you’ll want to remove it from there – or else it will re-install the next time you sync. Alternately you can keep the app in your iTunes Applications, and set iTunes not to sync all applications, just the ones you want to keep. See the Applications tab of your device the next time it’s connected in iTunes for syncing options.

Find “Settings” on your iPhone, iPad or iPod touch.
Then choose “General”, and tap the “Usage” option under it.
You can touch the “Show all Apps” button to get all your Apps on the device displayed.
Now, choose the one you want to delete and tap on it, then tap the “Delete App” button.
There will be a pop-up message letting you confirm the deleting action. Just tap the “Delete App” to confirm it.
That’s all. The app disappeared when you get back to the homescreen.

Apple doesn’t allow you to directly delete some apps pre-installed on the device. So when you want to delete them by using the way displayed above, you can’t make it. There is no “x” appears when the apps are shaking. Then what should you do? Is there any way you can make it? The answer is YES, and the solution is pretty simple below.
Go to “Settings” > Choose “General” > Tap “Restrictions”, and enter your security code > Turn off the app that you want to delete.
After that, go back to your device’s homescreen, and you’ll find that the app is gone.

Regret updating the app to the newest version and want to delete the unwanted update? Honestly, there is no such a way to directly downgrade your app on the iPhone, iPad or iPod touch. The only way is that you can find the previous version of the app from other app download centers and then reinstall it.
If you really don’t want to automatically update your favorite apps on your device, there is a way to stop it. you can set it up manually. How? It’s simple. Go to “Settings” and choose “iTunes & App Store” under it. You’ll see it as follows.

Then you’ll see the menu of automatic downloads. Turn off the option of “Updates” if it’s on. From now on, your apps on the device won’t be updated automatically, unless you do it on purpose.

Before selling your old ios devices,you must to remove apps on iPhone, iPad permanently,and make your old iPhone as new one. Today,we recommend you use iPhone iPad Data Eraser tool,which not only allows you erase apps from iPhone, iPad without restored,but also can help you remove app caches and junk files permanently to speed up the slow devices.The iOS Data Eraser can help you delete contacts, text messages, photos, videos, call logs, Apple ID and other private data on iPhone, iPad and iPod permanently,even no data recovery can get them back in market.
Free download the iOS Data Eraser and have a try.


Once running the Dr.Fone on your computer and you'll see all features inside as following. Select "Data Eraser" among all the functions.
.jpg)
Next, let's check how to use Dr.Fone - Data Eraser (iOS) to erase all data on the iPhone in steps.
Step 1. Connect your device to the computer
Connect your iPhone or iPad to the computer using a lightning cable. Once it recognizes your device, it displays 3 options for you. Choose Erase All Data to start the data erasing process.
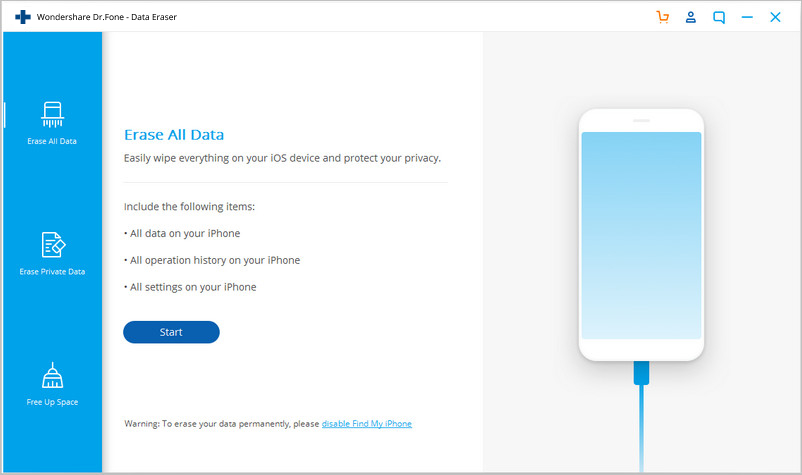
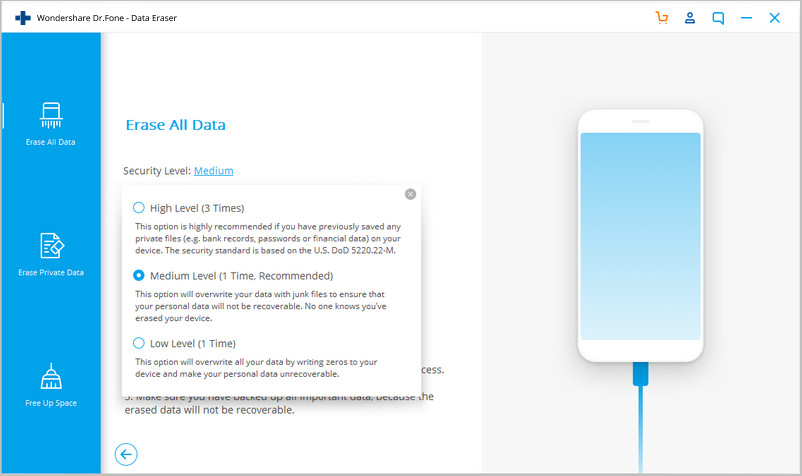
Step 2. Start erasing your iPhone completely and permanently
When the program detects your iPhone or iPad, you can select a security level to erase iOS data. The higher the security level, the lower possibility your data can be recovered. Meanwhile, a higher security level takes a long time to erase.
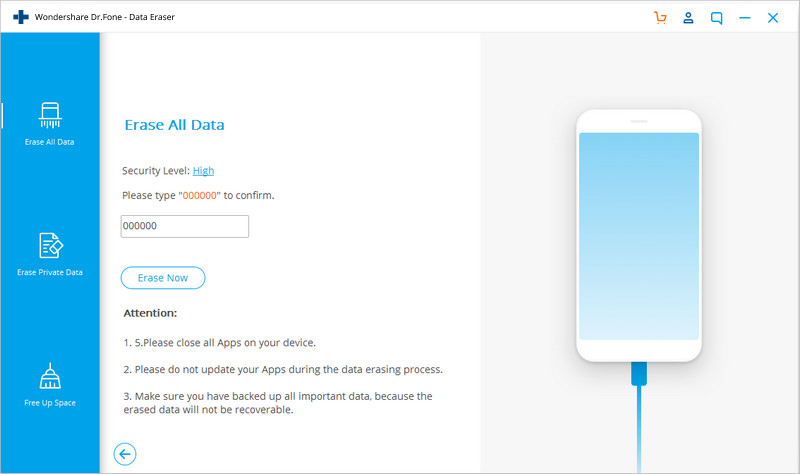
Since the erased data can't be recovered, you need to be careful and enter "000000" to confirm your operation when you are ready.
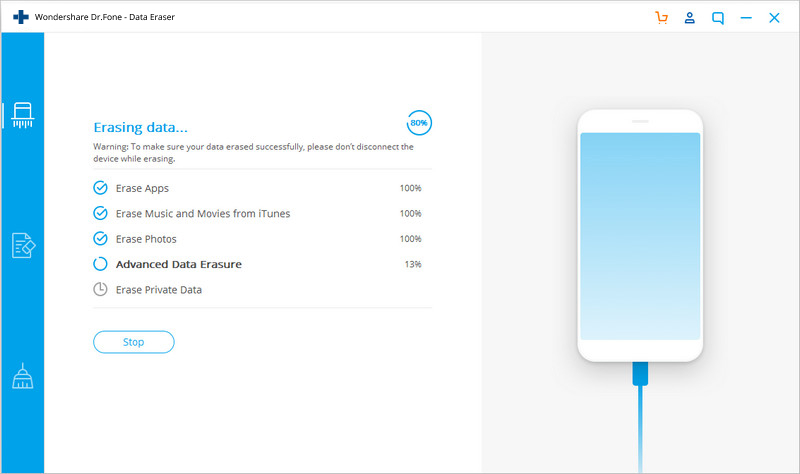
Step 3. Wait until the data erasure is complete
Once the erasure begins, you don't need to do anything, but wait for the end of the process, and keep that your device is connected during the whole process.
The program requires you to confirm the rebooting of your iPhone or iPad. Click "OK" to continue.
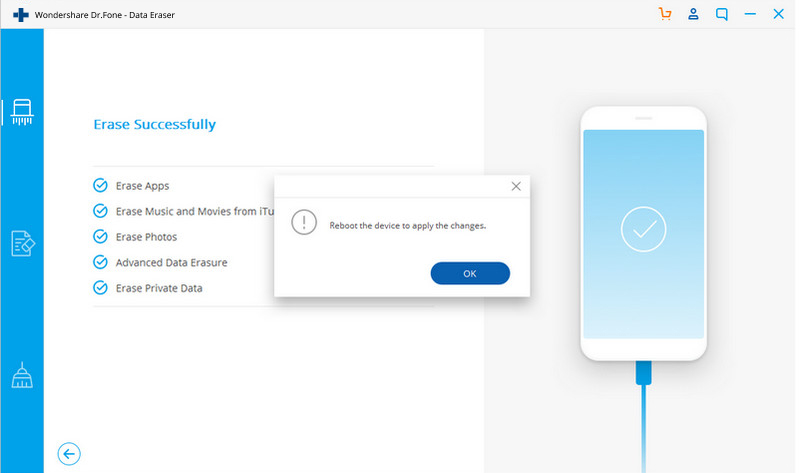
When the data erasure is complete, you will see a window appearing as follows.
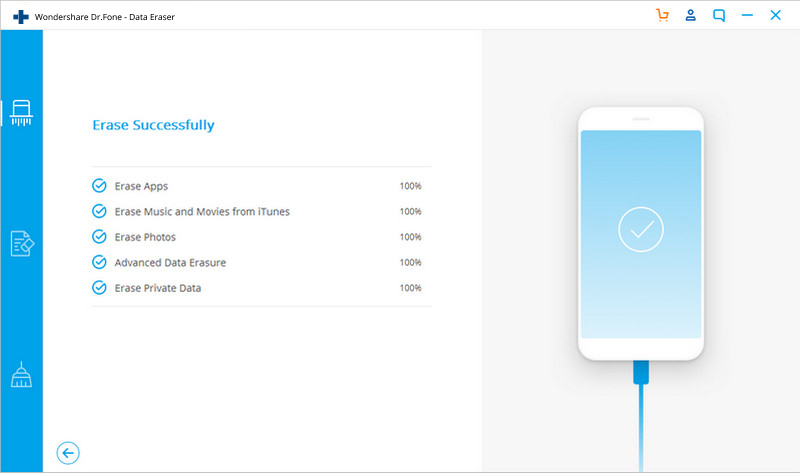
Now, your iPhone/iPad is fully erased and turns into a new device with no content, and you can begin to set it according to your need.
Tips: Once wipe data on your ios devices by this powerful iOS Data Eraser tool,you can not get them back,even by professional iOS Data Recovery in market,however,we recommend you backup iPhone data to computer before erase data by this program,such as contacts, text messages, photos, videos, music, notes, call logs,ect.In additional,you can use iPhone iPad Data Transfer to free backup old iPhone before iOS upgrading, downgrading or jailbreaking,if you have any question,please contact us in Facebook or Google+.