 Home >
Why Need USB Debugging on Android Device?
USB debugging mode functions as a developer to allow you to transfer data between phones/tablets and computer, install apps on Android devices on computer with ease, and apply some programs on PC which works with Android devices, like Android Data Recovery, Super Root, Kingo Root, Android & iOS Manager, etc.
What’s USB Debugging on Android Device
USB debugging mode is provided by Andrews system for the development of a function, the use of this feature can be copied between the computer and Andrews data, installed in Andrews game software and so on. By default, USB debug mode is turned off, so you need to manually open it. Open the USB debugging mode, can only be in the computer to the phone in the game, so it is very important. USB debug mode does not open? Let’s teach you how to enable USB debugging on Android devices step by steps.
To enable developer options/USB debugging mode on Android,different Android OS version of the different debugging methods, but the method is the same and belong to the same model of smartphone,please make sure which Android OS is in your devices and select the corresponding method for your phone.
| Part 1: Android 5.0 Lollipop to Android 5.1.1 Part 2: Android 4.2 Jellybean to Android 4.4.4 Part 3: Android 3.0 Honeycomb to 4.1 Jellybean Part 4: Android 2.3 Gingerbread or Earlier |
The recent version of Android OS which is used by Samsung Galaxy S6, HTC One M9 +, etc., requires you to follow a little more steps to fix this issue.
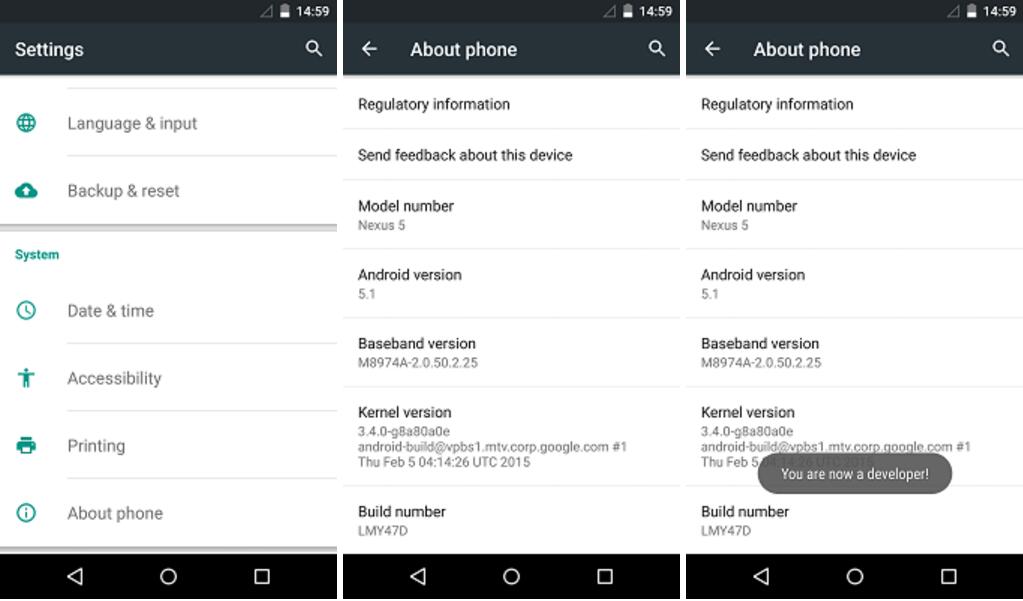
Step 1. Enter Settings
Move your finger to "Settings" > "About Phone" > "Build number" on your Android phone to tap seven times to call for "You are now a developer!"
Step 2. Tick "USB Debugging"
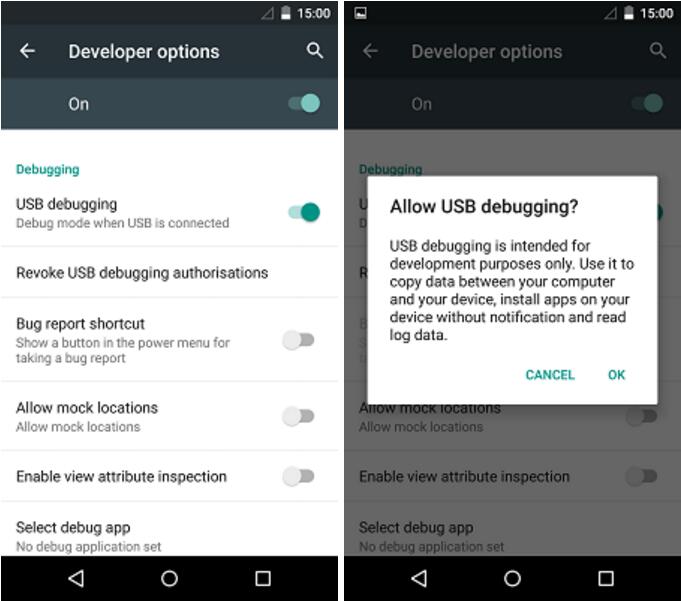
It is time to return to "Settings" screen to choose "Developer Options" and then, select "USB Debugging". That is done with pressing "OK" option.
The devices running Android 4.2 to 4.4.4 can be enabled USB debugging in the similiar way to Android 5.0 Lollipop.
Step 1. To be a Developer
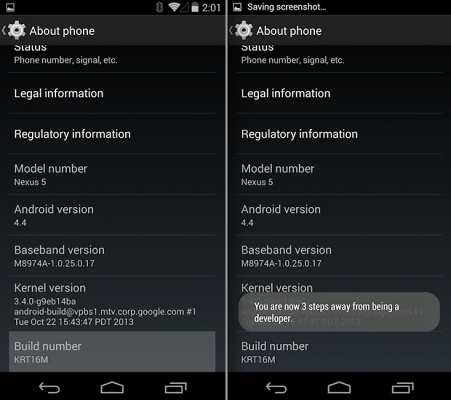
Find out "Settings" option and tap it. Then, move to "About phone" and scroll down to tap "Build number" for 7 times to gain a signal telling "You are under developer mode!"
Step 2. Set up USB debugging
At this point, tap "Settings" to go into "Developer options" screen to turn on "USB debugging" mode.
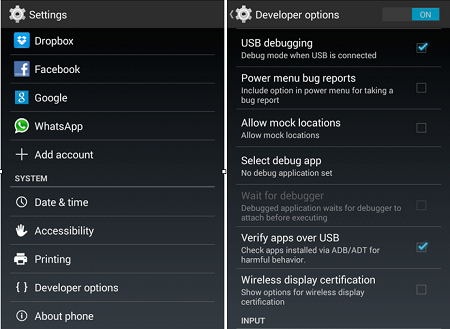
Go to "Settings" screen and tap "Developer options". Then, tap the box next to "USB debugging" so that you can connect your device to computer which can be done before enabling USB debugging, also.
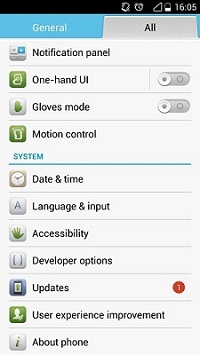
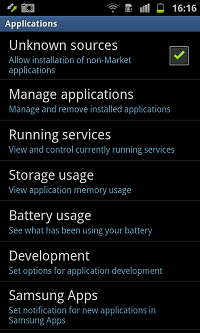
Tap "Settings" on the home screen to enter "Application" > "Development" and tick "USB debugging". That's it!
Through the above basic simple steps to enable USB debugging on your personal Android phone, and then connect the computer can be quickly recognized by the computer, and can be used. We use the brush machine or pea pods and other mobile phone applications must open the USB debugging switch, so that software identification can be further operations.Now, you can download files to your phone freely and quickly root your phone, manage your Android on computer,back up and restore your Android data
, etc.
Related Articles:
How to Recover Deleted SMS on Broken Android Samsung
How to Recover Data on Broken Android Phone
How to Transfer Apps from Android to Android
How to Root your Android
Recover Contacts from Broken/Dead/Locked Android
Android Photo Recovery: Recover Deleted Pictures from Android Devices