
 Home >


As we all know,after restore iPhone to factory settings,it may erase all data and setting. Once all the contacts, sms, photos, videos stored in iPhone are lost,is there a way to recover lost data from iPhone after factory setting restore? As to restoring iPhone to factory settings failure,sometimes you may found all data erased, because the data might have been overwritten during the restoring.However,we must to backup all data from iPhone to computer,and then restore those backed up files to iPhone after restoring to facory settings.
If you have bought a new iPhone 13,the first thing you want to do is transferring contacts from old phone to new iPhone 13,please go to:
How to transfer contacts from Android phone to iPhone 13
How to transfer contacts from iPhone to iPhone 13
Back Up Data and Restore to iPhone after iOS 15 Update or Jailbreak
Sometimes,data stored on your iPhone lost due to deletion, device crashed, smashed or broken, device loss, jailbreak, iOS upgrade or factory settings restore.To avoiding data lost or deleted on your iPhone,the best way to keep important contents safety is transferring data from iPhone to computer or Mac,then restore those backup contents back to the iPhone,or transfer those backups to your new iPhone 13, iPhone 12 and iPhone 11.

Before upgrading your iPhone to iOS 15 or jailbreak the new iPhone 13/12/11,in order to avoiding data lost,you must to backup Contacts,SMS,Photos,Videos and more from iPhone to computer or Mac,however,the data stored on your iPhone never lost after iOS 15 update or jailbreak.
|
Way 1: Backup and Restore iPhone by iOS Backup & Restore Tool |
The iPhone Data Backup and Restore tool - iOS Backup & Restore Tool not only can help you backup Contacts, Messages, Photos, Videos, Call Logs, Whatsapp Messages, Memos and other data from iPhone 13/12/11/XS/XR/X/8/7/6S/6/5S/5/4S to computer,but also allows you recover lost data from iPhone.As an all-in-one iPhone Backup, Restore and Data Recovery tool,it enables ios users backup and restore files from iPhone 13, iPhone 12/11 on computer,the iOS Backup & Export Tool can help you backup and export data from iPhone to computer directly, making it easy for users to backup, export and print iPhone data on computer. In additional,you can use the iOS Backup & Restore Tool to restore the backup data back to the iPhone 13, iPhone 12 or iPhone 11 device selectively,if you have purchase a new ios devices,those backups let you transfer data from your last device to your new iPhone, iPad or iPod.
Free download the iOS Backup,Restore & Data Recovery tool and have a try!
.png)
.png)
Let’s take backup and restore data from iPhone on computer for example,you can also backup, export contacts, text messages, photos, videos, music, notes,call logs,etc from old iPhone to computer,then transfer those backups contents to new iPhone 13, iPhone 12, iPhone 11 or iPad Pro, iPad mini 4.
How to Backup and Restore Contacts from iPhone
1. Backup Your iPhone/iPad/iPod Touch
Step 1. Connect iOS Device to Computer
After launching Dr.Fone on your computer, select Phone Backup option from the tool list. Then use the Lightning cable to connect your iPhone, iPad or iPod touch to computer. By default, Dr.Fone will automatically detect your iOS device.
.jpg)
For iOS devices, Dr.Fone supports to backup most data types, including privacy data, social App data, such as WhatsApp, LINE, Viber, Kik data, etc. In this case, we select Device Data Backup & Restore.
.jpg)
Step 2. Select File Types to Backup
After your select Device Data Backup & Restore, Dr.Fone will detect the file types on your device automatically and you can select what file types to backup. Then click on "Backup".
.jpg)
You can also click on the folder icon below the file types to customize the backup file saving path.
The whole backup process will take a few minutes, depending on the data storage on your device. Then Dr.Fone will display all the supported data, like Photos & Videos, Messages & Call Logs, Contacts, Memos and other data.
.jpg)
Step 3. View What's Backed Up
When the backup is completed, you can click View Backup History to view all iOS device backup history. Click on View next to it to check the contents of the backup file in categories. You can choose one single file or mulptiple files to print them or export them to your computer.
.jpg)
2. Restore Backup to Your Computer
Step 1. Select the backup file
Lauch Dr.Fone and select Backup & Restore. Connect your iPhone, iPad or iPod Touch to the computer. Click on Restore.
If you have used this function to backup your iOS device before, it will offer the option View backup history . Click on this option to view the backup file list.
.jpg)
Then Dr.Fone will display the backup history. Just select the backup file you need and click on View button next to the backup file, or Next on the buttom of the program.
.jpg)
Step 2. View and Restore the backup file
After you click on View, the program will take a few seconds to analysis the backup file and display all data in catagories in the backup file.
.jpg)
After you find the files you need, you can just select a few files or select them all to proceed to next step. Currently Dr.Fone supports to restore the Notes, Contacts, Messages, Photos, videos, music, Safari bookmarks, Call History, Calendar, Voicememo to device. So you can restore these files to your iOS device or export them all to your computer.
If you want to restore the files to your device, select the files and click on Restore to Device. Just in a few seconds, you will have these files on your iOS device.
.jpg)
If you want to export the selected files to your computer, click on Export to PC. Then select the save path to export your files.
(1).jpg)
Free download the Dr.Fone for iOS and have a try!
Phone Transfer not only can help you transfer contacts, messages, call logs, calendar, photos, music, video and apps between iOS, Android, WinPhone and Nokia Symbian,but also can help phone users backup and restore phone’s data on computer.If you use iPhone, iPad or iPod Touch,the Phone Transfer enable you backup data from iPhone 12, iPhone 11, iPhone XS/XR, iPad Pro, iPad mini 4 to computer,and then restore the backups to ios devices again,including contacts(names and numbers, but moves job title, email address, company name, and more.),text messages, photos, videos, call logs, music,ect.
Free download the Phone Transfer and have a try!


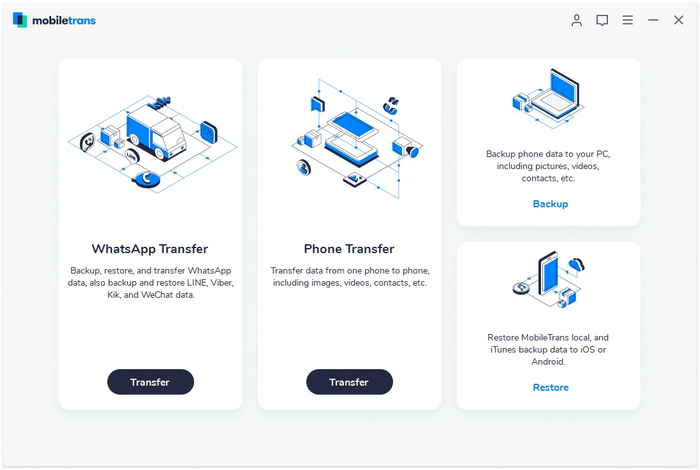
Part 1: Backup Contacts,SMS,Calendar, Photos,Videos, Music from iPhone to Computer
Step 1. Connect your phone to the computer
Connect your device to the computer. Run the module "Backup" after you open MobileTrans.
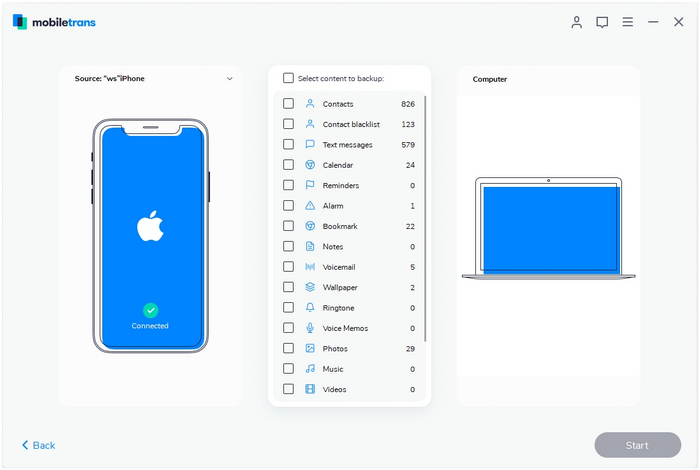
Step 2. Select file types and begin backup
After that, MobileTrans will load all supported file types. It supports different file types for iPhone and Android phones. Select the file types you want to back up and click on "Start".
Here is an example for iPhone's file types to backup:
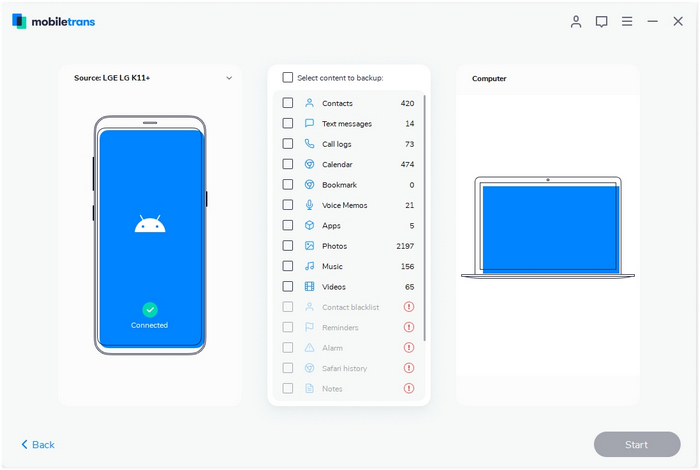
This is the supported file types for Android phones:
Step 3. Backup completed
Keep your phone connected and back up will complete in a while. You can view what's backed up using Restore from the "MobileTrans backup file" on the "Restore" module.
First, launch the MobileTrans and open the "Restore" module on your computer.
.jpg)
Let’s see how to restore from phone devices' backups made by MobileTrans.
Step 1. Choose "MobileTrans backup file" and the backup file
Select the feature "MobileTrans backup file" on the software. MobileTrans will detect the backup files you've ever made by the software. Select the backup file you'd like to extract from if you made several backups.
![]()
Step 2. Connect your phone to your computer
Now connect your iOS or Android phone to the computer.
Here takes a screenshot of restoring from an iOS backup as an example:
![]()
Step 3. Select file types and start to restore data
Select the file types you'd like to restore and click on the "Start" button. It will complete the restoration in a while. Please keep your phone connected during the transfer.
If you want to erase current data on the phone, you can tick "Clear data before copy". It's not checked by default.
![]()
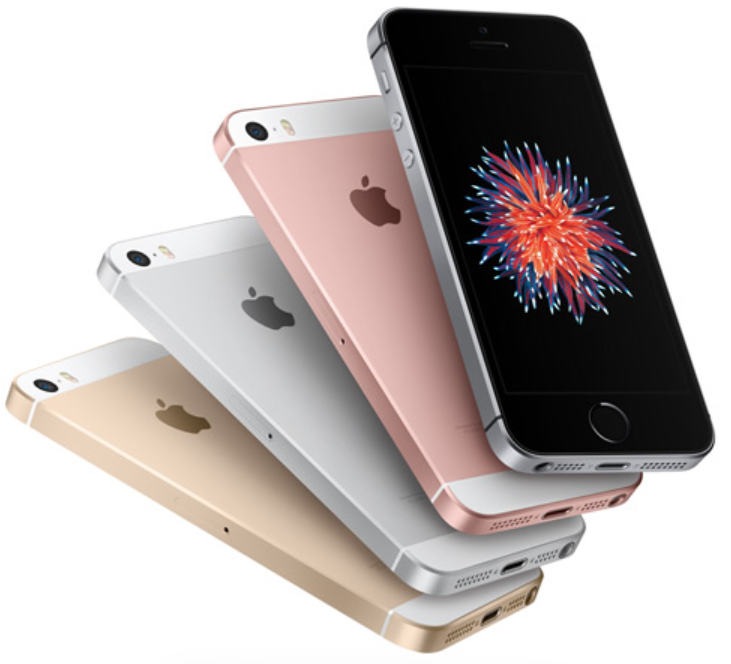
Step 1. Connect your device to a Wi-Fi network.
Step 2. For iPhone SE, iPhone 6S/6 devices,please tap Settings > iCloud > Backup.
Step 3. Turn on the iCloud account on your iPhone SE.
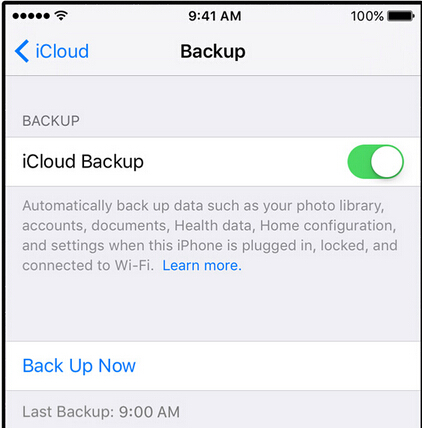
Step 4. Click the “Back Up Now” option.
Tips: Please keep connecting your iPhone SE to Wi-Fi network until the process completes.
Step 5. Make sure the backup finished by tapping Settings > iCloud > Storage > Manage Storage, and then select your device. The backup you just made should appear in the details with the time and backup size.
Follow more steps if you need help making a backup in iCloud.
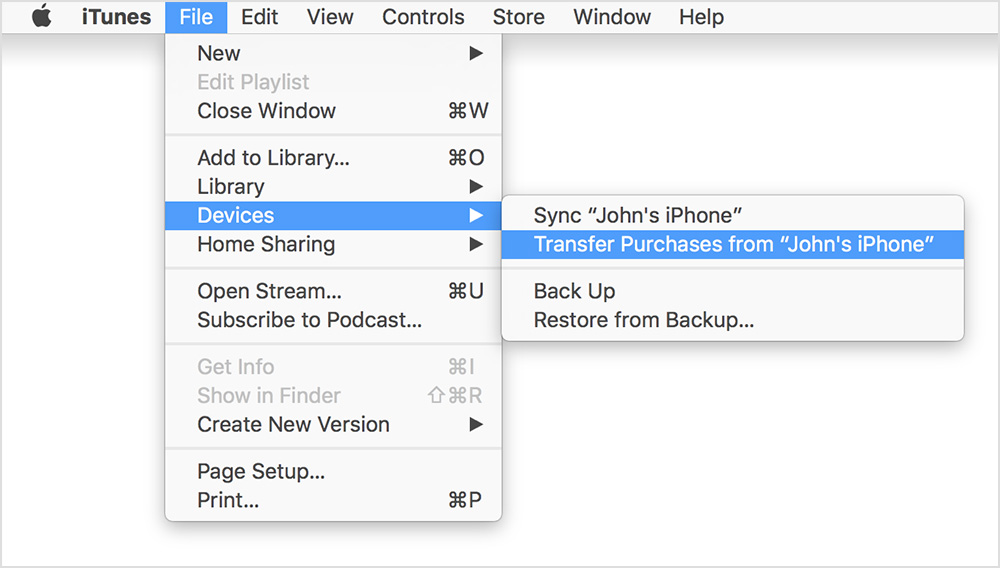
Step 1.Connect your iPhone SE to computer and Run the iTunes on computer
Step 2. Transfer Purchases Contents to iTunes from iPhone
If you have the purchases music, apps on the iTunes Store or App Store,to backup them to iTunes,please clicking “File > Devices > Transfer Purchases”. Then wait for the transfer to finish. If you're using Windows and you don't see a File menu, hold down the Control and B keys.
Step 3. Backup Up Health and Activity data from iPhone or Apple Watch
You’ll need to encrypt your backup: Select the box called Encrypt [device] backup and make a memorable password.
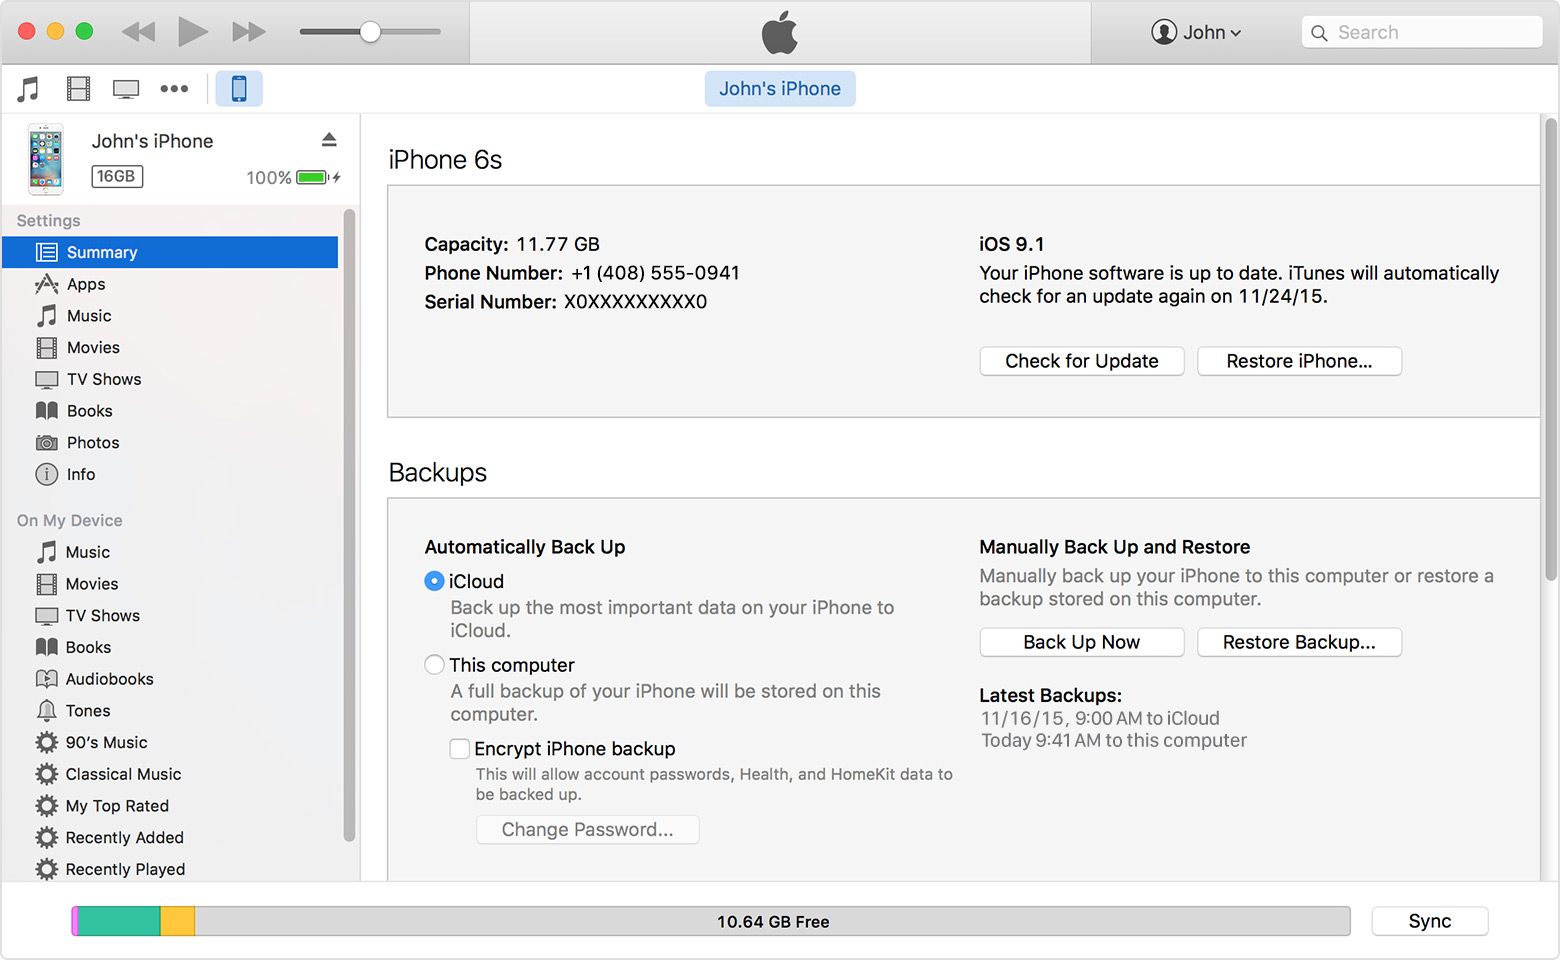
Tips: Write down your password and store it somewhere safe, because there's no way to recover your iTunes backups without this password.
If you don't need to save your Health and Activity data, you can make a backup that isn't encrypted. Just click “Back Up Now”. If you're using Windows click File > Devices > Back up (if you don't see a File menu, hold down the Control and B keys).

Step 4. After the process ends, you can see if your backup finished successfully in iTunes Preferences > Devices.
You should see the name of your device with the date and time that iTunes created the backup. If you encrypted your backup, you should also see 1 beside the name of your device.
Follow more steps if you need to backup by iTunes. Learn how to encrypt your backup on iTunes.
Related Articles:
How to Restore Deleted Contacts on iPhone 8/7/6S
How to Recover Deleted Photo/Video from iPhone 8/7/6S
How to Transfer Contacts between Samsung and iPhone XS/XR/X
How to Get iPhone SE Out of Recovery Mode
How to Recover Lost Data and Fix iOS 15 Bugs on iPhone, iPad


 Copyright © 2012 Z0DOWNLOAD.COM. All rights reserved.