 Home >
Question: when I enter my question in the search engine: "how to add subtitles and audio tracks before burning DVD". The answer I got is to make me run away: add an audio track on the original basis, which requires multi track DVD technology and at least three software. I'd like to know how to use the fastest way to solve the problem of adding subtitles and audio tracks before burning DVD. Can you tell me?
Many times, we like to watch videos with interesting subtitles and charming audio tracks to make ourselves have a more pleasant viewing experience. Maybe our favorite video lacks subtitles. Maybe the video we want to burn is not our favorite background music or your favorite audio track, so we certainly want to be better according to our preferences before burning. Next, I'll give you the best way to add subtitles and audio tracks before burning a DVD.
Adding subtitles and audio tracks before burning a DVD, I strongly recommend that you use Burnova. It can add subtitles and audio tracks to DVD, create local videos or burn online movies from PC, DVD or Blu ray Disc / ISO / folder, from youtube, Vimeo, etc. In addition, it can burn youtube and other online videos to DVD discs, DVD folders or ISO files. Burn videos from youtube, Facebook, Vimeo, VEVO, Yahoo and more online video sites for playback and DVD production. It can also provide a variety of templates, including holidays, families, travel, weddings, etc., to specify your different types of movies or videos.
Step 1. Insert a blank DVD or Blu-ray disc to the DVD drive if you want to burn videos into DVD disc.
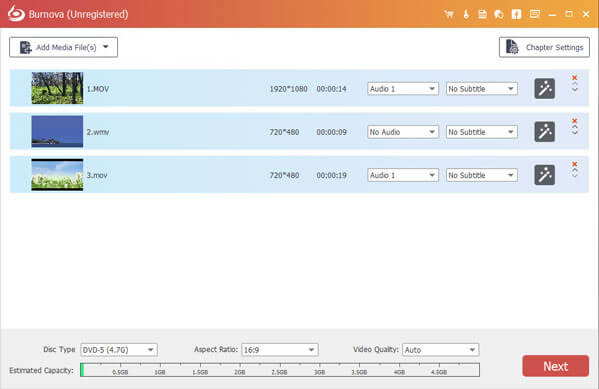
Step 2. Click "Add Media File(s)" to add one or more video files to this software.
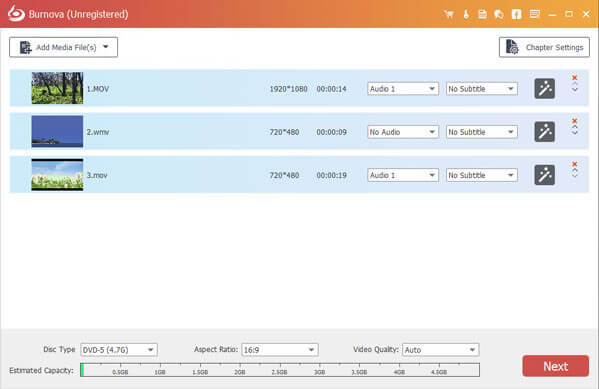
Step 3. Click the edit button in the main interface to edit videos.
Step 4. Choose Disc Type in the bottom-left corner to make sure what type of DVD or Blu-ray disc you want to burn video into. Click "Next" to edit DVD menu.
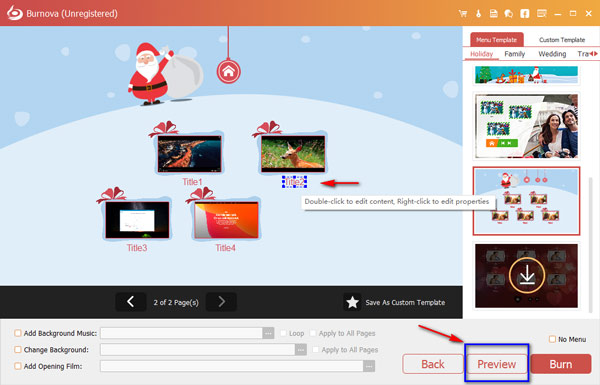
Step 5. When you enter in the menu editing interface, choose a menu template for your DVD. You can click the "Preview" button to preview your DVD.
In the Preview interface, click the "Play" button to make all videos play in order.
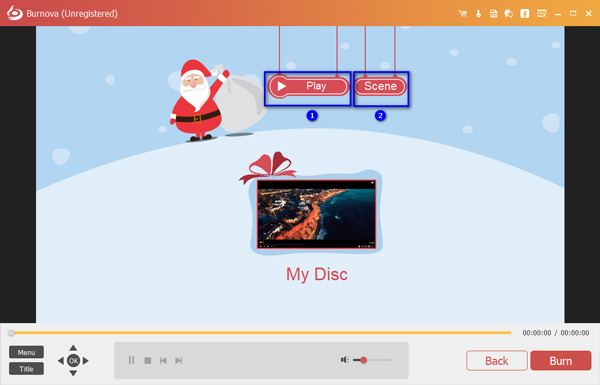
If you want to play videos at random, click the "Scene" button to view your videos. Then, choose and click the one you want to play.
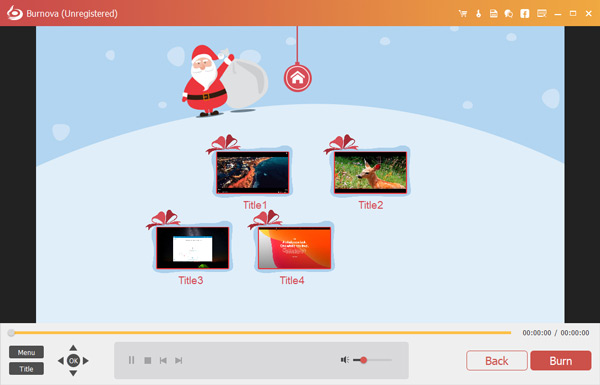
Step 6. Click "Burn" to get the DVD/BD burning settings
Here you can make the DVD settings as the following:
• Select create video to DVD disc or DVD folder/ISO file.
• Choose the TV standard as NTSC or PAL.
• Play the DVD file from the first title or menu.
• Loop all titles or not.
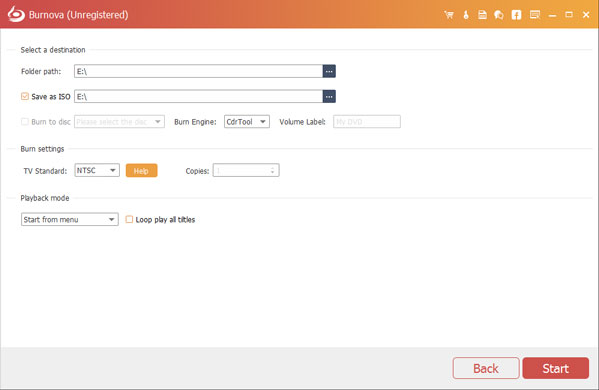
Step 7. After making all settings, click "Start" to burn your videos to DVD/BD.
Before you make the movies or videos to DVD, you are allowed to edit your video effects freely to animate your videos.
Step 1. Click the "Edit" button to enter the editing interface.
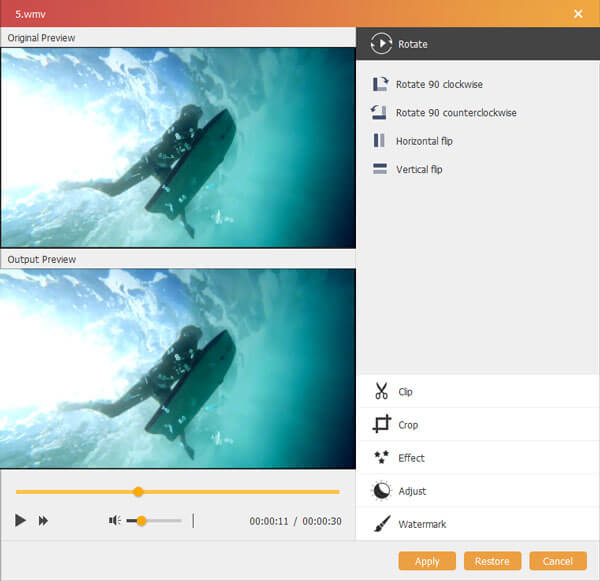
Step 2. Rotate or flip video
Click "Rotate" to rotate video in 90 clockwise or 90 counterclockwise or flip horizontally or vertically.
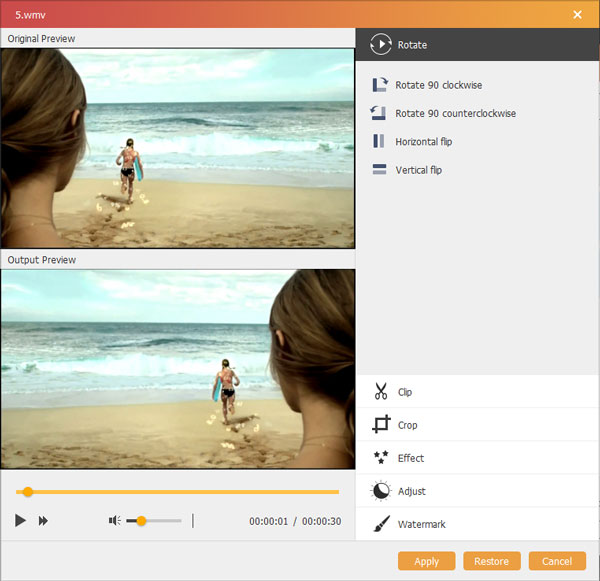
Step 3. Clip video
Click "Clip" to drag the bar automatically or set the start time and end time to cut the unwanted video parts.
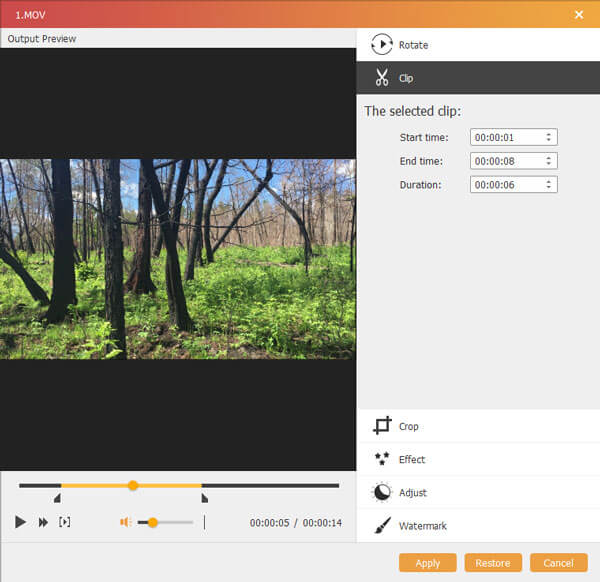
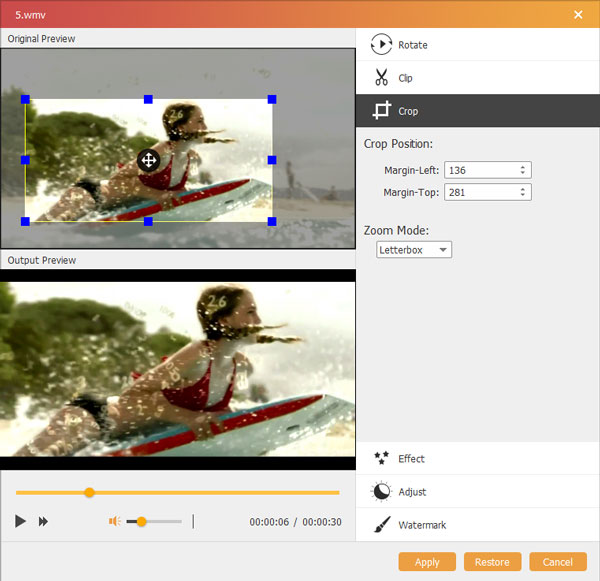
Step 4. Crop video
Click "Crop" to select the zoom mode as "Letterbox", "Center", "Pan & Scan" or "Full" to get rid of the unwanted edges or capture the wanted parts.
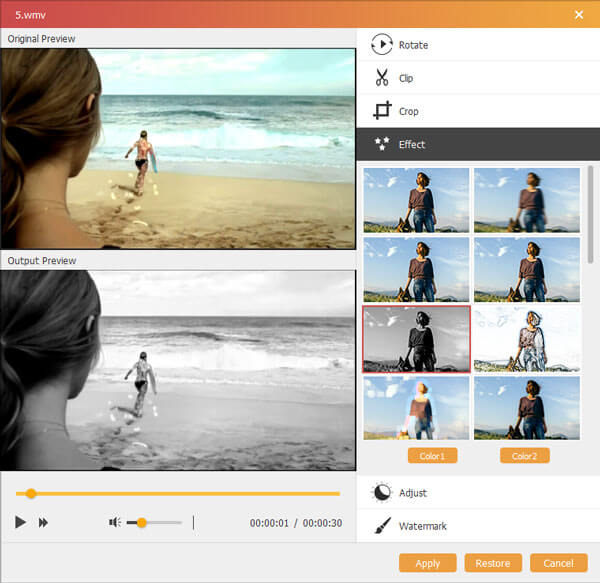
Step 5. Change effects
Click "Effect" to color for your videos. Here you can edit video effects like photos as Blur, Sharpen, Frame, Gray, Sketch, Color Pencil, Erode, Pixelate, Noise, Sculpture, Emboss, Smooth, Canvas, Mirror, Material, Wave, etc. Check this page to know more about special video effects.
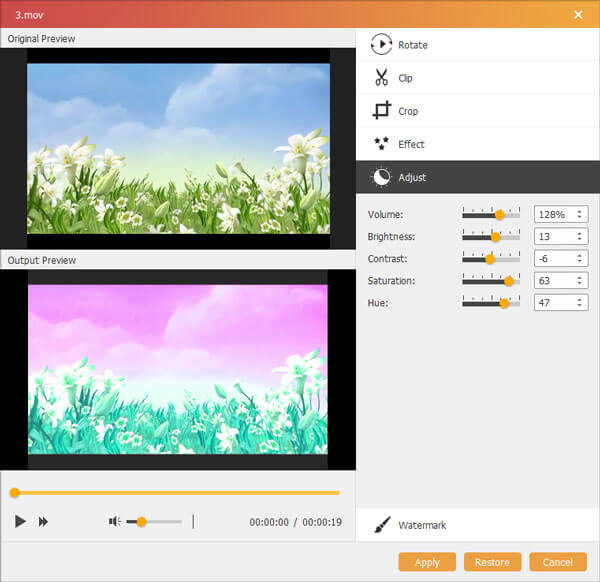
Step 6. Adjust video
If you do not like the brightness or contrast, you can click "Adjsut" to manually adjust the brightness, contrast, saturation, hue and volume.
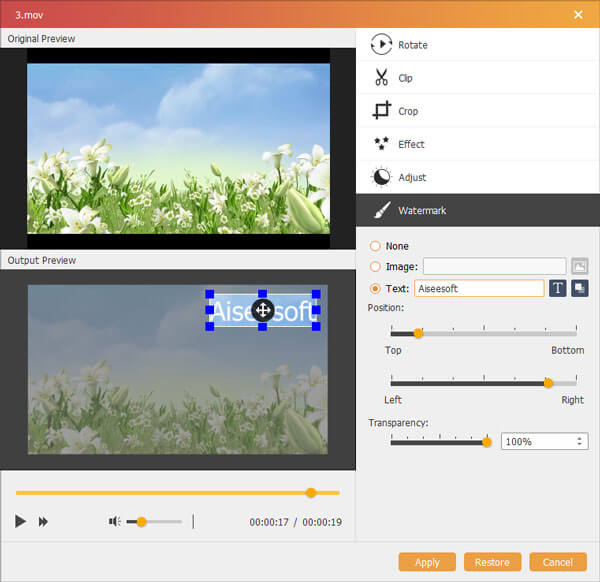
Step 7. Watermark
If you want to add your own mark to the video, you can click "Watermark" to add text or images as the watermark on your video files.
After editing your videos, you could edit the menu for burning.
Step 1. Click "Next" to enter the menu editing features.
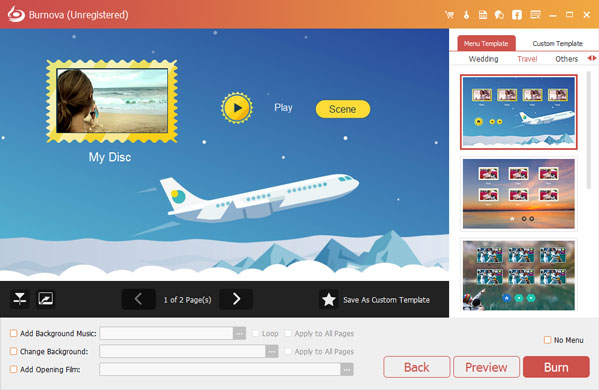
Step 2. Menu templates
Here you can use the default templates of this software, or download from online sites to make the menu background. Moreover, if you do not like those, just click "Change Background" to import your own images or photos as the menu background.
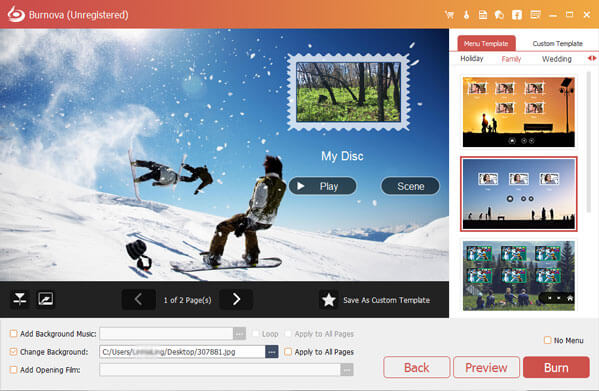
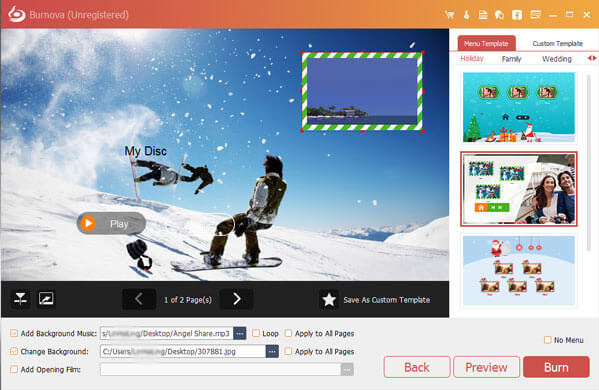
Step 3. Add background music
Checkmark "Add Background Music" to import the audio file. Her e you can set the music as loop or single playing.
Step 4. Add opening file
Want to make your video more enjoyable? Then add opening film. You can use downloaded or local opening film to make your video more professional.
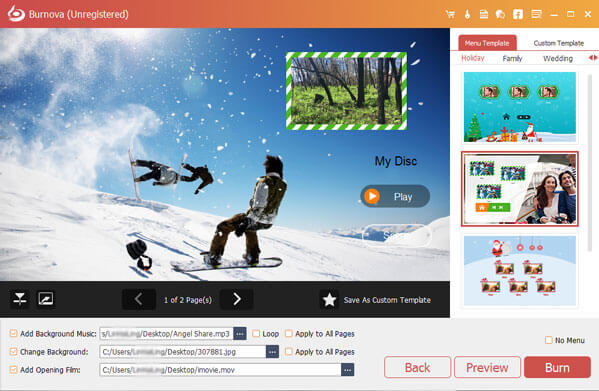
After you make menu settings successfully, click "Next" to proceed the subsequent steps.
The above step guides show you how to use Burnova to burn videos to DVD/Blu-ray. For this software, still some features you cannot miss in this part.
Update
For checking the new feature of this software, you need to make settings to get the update reminder. Click "Menu" > "Preferences" > Tick "Check Updates Automatically".